Lazy Sewing

Admit it, we’ve all done it – taken those short cuts that any professional sewer would shake their head at. Sometimes it’s just easier to cut the corners and move on hoping that no one will notice, and chances are, they won’t. Take a look at these and let me know if you do any of these things and what other short cuts can I take in the future. 😉

Mix-Matching Bobbin Thread – This is probably one of the most common things that I do on a regular basis. I’ll be using white thread on top and then chances are if I was using red bobbin thread ealier on… I’ll probably use red bobbin thread again. ACTUALLY red bobbin thread was probably a bad example because I know I’m going to want to conserve it so I won’t have to wind another red bobbin – therefore I may go ahead and change it. Let’s just switch the colors in this scenario, you get what I’m saying though. I have no problem using 2 different colors of thread.

With that said, when I am using my embroidery machine, I will use the same color, but with basic sewing, you can guarantee there are probably two colors of thread.

Not Changing Needles – I’m sure this is a “no no” but I rarely change my sewing machine needles. There are several different rules of thumb that sewers are supposed to go by in order to keep their sewing machine running in tip top shape. *Change the needle in between each project * Change the needle every 4 hours of sewing * Change your needle every 8 hours or sewing * Change your needle every third bobbin you go through * OR you could be like me and change the needle when you start hearing it make that “thud” sound in your fabric, or the stitches start getting a little bit wonky. Or (shakes my head in shame) wait until the needle breaks to change it and hope that you aren’t top stitching something important.

Not Pre-Washing Fabric – This morning is actually the first time I have ever prewashed fabric and that is because I am making a baby blanket for a friend. Other than that, I just never do it and never have done it. I really wish I did do it more, but chances are when I come home with new fabric, I’m just ready to dig in!! Another reason why I don’t wash my fabric is because I don’t do a lot of clothes sewing. I typically enjoy sewing handbags or wallets or that type of thing that doesn’t usually get washed after it is sewn together. I also feel like it takes away from the crispness of the fabric. I feel that the baby blanket that I am making would actually look much sharper if I didn’t wash the fabric, however with a baby being involved, I didn’t really want to take that risk.

Leaving Basting Stitches In – That’s right, I do that too! One of the worst parts about sewing is “Frog Sewing”. Don’t you just hate when you have to “Rip it, rip it, rip it”? HA!!! But seriously, why on earth would I want to stitch something knowing that I will have to pick the stitches out at a later time? I can see why people do it when they press the seams open on a project, but for me, I typically press to one side and one side only…. THE DARK SIDE… DUN DUN DUUUNNNNN. I know that typically these are bigger stitches that are easy to pick out, I just don’t like doing it.

No Steam for Iron – I’m not saying that I DON’T iron, I just don’t ever use steam. It mainly comes down to I just never put water in my iron. Last time I traveled with my iron, the water that was in it ended up leaking, which is why I haven’t filled it back up yet. I totally love my iron and I honestly don’t know if it would make a difference if I did use steam or not.

Well these are a few of my most commonly used lazy sewing techniques. Let me know what you use to cut the time of a sewing project down!!

Until next time,

~Brittany

Where have I been?

I was so excited to start sharing everything I have made with everyone and then it seemed like I just fell off the face of the Earth. Here is a little bit  about what I have been up to…

First of all, back in February of this year, I was officially promoted to the Detective position. “Well she didn’t disappear until June” yall are probably telling yourselves. My Detective position is very rewarding, yet is very challenging. I typically work M-F 8a-5p and recently it has been once 5p hit, I was ready to go to bed. That’s not mentioning all of the times I ended up working late.

Another thing that ended up happening is that my husband and I are expecting our first child!! What that means is I am tired ALL OF THE FREAKIN TIME!! Don’t get me wrong, I am super excited about the arrival of little Lily, but who would’ve thought that a little rice-sized human could drain you so much. Between the two of these very exciting things, all I wanted to do was to plop on the couch and fall asleep watching T.V.

So to answer the question “Where have I been?” ….. the answer is on the couch snoozing.

I felt so bad about not sewing anything that I wouldn’t even stop by the fabric section at Walmart to see what new seasonal fabric they had because I knew I wouldn’t be touching it. Or go into Jo Ann’s just to touch all of the “feel good” fabrics.

I would do little things here and there, like fix a hole in one of Josh’s shirts or do a small something that only took 10 minutes to do. I would then tell him “man, I really miss sewing”. I would also just sit on the couch just longing to sew something, but I just couldn’t bring myself to do it. I’m sure I am not the only one that has experienced this, but it just made me sad to not be sewing anything.

This weekend on Sunday I actually got up early (like still dark early) to fix a pair of Josh’s jeans that had ripped. Then I finished up a table runner. Then I pieced together another table runner. Then I made him an awesome Halloween vest for Josh. I literally spent all day sewing that Sunday and it was GLORIOUS!!!

Then Monday hit and it was back to work and school again. Oh my goodness…. I can’t believe I didn’t mention grad school…. This semester I am taking a course called Program Evaluation and I cannot even begin to tell you how much I dislike this class. I also happen to have one of those professors that likes to assign 48048504 discussion boards, and then you have to respond to each discussion board 18 times to engage in conversation because it is an online course. Obviously I am exaggerating a little bit, but while I am on the couch attempting to take a baby nap, I think about how I can get out of doing my homework and push it off until tomorrow.

Also, some good news…. I’m not even sure if anyone knew or not but I had misplaced the pedal for my sewing machine. I ended up (accidently) ordering 2 pedals and neither of them worked. I was so bummed because it had been so long since I had a pedal for my machine and I couldn’t quilt anything. Well I have finally found one that works!! I have no idea where I got it from, but I am super glad that I found it and it was so nice having it this weekend!!!

Well that’s about all I got for this time and hopefully I’ll be able to post again shortly.

Until next time,

Brittany

Floating Shelves Tutorial

So this is my very first wood working project that I completed on my own!! I’ve done some projects with the help of family members, but living over 400 miles from them, makes it difficult for them to come up for every project.

I got the idea, first of all it is all over Pinterest, and secondly, I really needed somewhere to keep my sewing machines when I am not using them. Typically I store them under my desk that I sew at, but then there are cords everywhere, or else I will accidently kick one. It is just not ideal. My husband and I recently moved our bedroom upstairs in our house and I decided to move my sewing room downstairs. This room is the perfect size and the location is excellent. A lot of the time, I would go upstairs to sew and I would feel very antisocial in my own home. Typically Josh would be in the living room watching/playing something sports related, so I would bring my sewing stuff downstairs….. which then would turn the dining room into a disaster because I would continuously bring stuff down one by one and then never take it back upstairs.

Anyway, onto the tutorial…

*Note: Keep in mind that I am not an expert. I have a basic knowledge of power tools, but as the saying goes, “There is more than one way to skin a cat”. (Sorry to my vet school sister for that analogy).

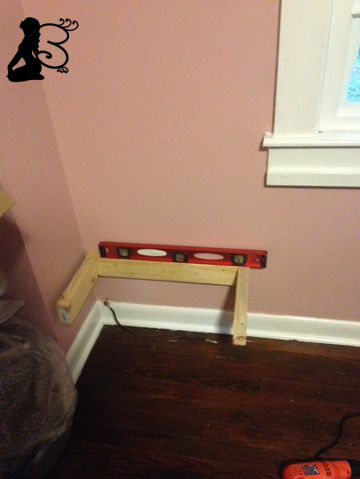
I started off by figuring out where I wanted the shelves to go. There is a small spot between the window and the corner that juts out, so I figured it would be the perfect place. Plus, it was roughly the size of my sewing machines. (I didn’t get a before picture, but you will be able to see what I’m talking about in the pictures below.)

I didn’t really plan out how I wanted to do it because I figured things would change as I went along, which they did. I initially wanted to have 5 small shelves going up, but after I got my first one up and put a sewing machine one it, I decided to cut back to 4.

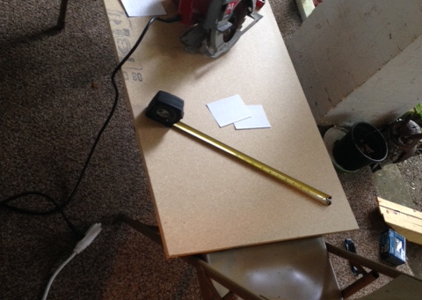
I started out by getting 3 2x4x10 boards made of pine. These run about $4ish a piece. I chose 10 feet because I estimated my shelves being about 24 inches (you will have to parden the inches talk, I’m still in sewing mode) wide and about a foot deep. It was also a good length that wouldn’t stick out of  the rear of our car too much. I ended up only needing 2 of them though.

Picture4

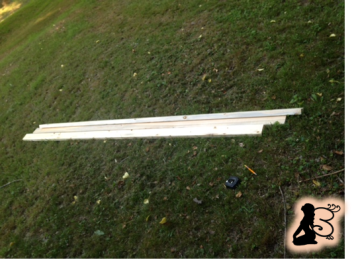
Next I cut 5 pieces (I cut 5 because originally I was wanting to make 5 shelves) of the wood 24 inches long. The math actually came out perfectly and I got 5 perfect 24 inch boards out of my 10 foot board.

Picture6

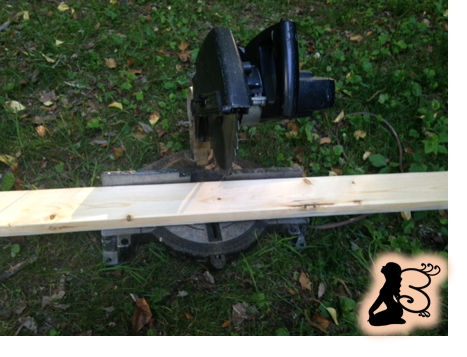
This is a saw that my dad gave me to use. It wasn’t until I was almost done that I realized it is a smidge off, as in like 1/2 a degree. Fortunately ended up not being that big of a deal, but when you looked at them up close, you can definitely tell they are slightly slanted.

Picture5

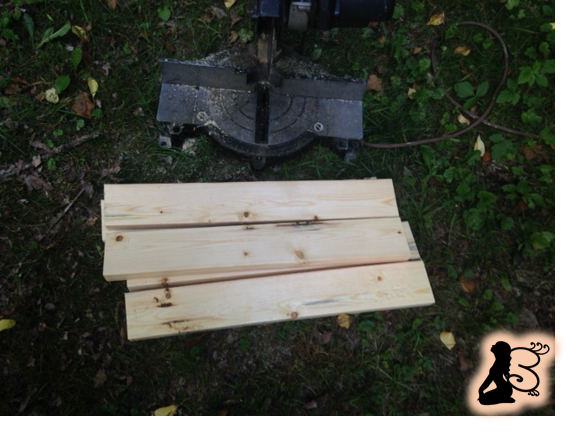
Also, funny story about that saw… I texted my dad and told him that I would have to rig up something for the saw dust because after every  cut, I would get showered with it. Visual picture, imagine me cutting the boards and then running away before gravity pulled the saw dust down on top of me. Anyways, he said that he has the attachment at one of his houses and hopefully I will get it very soon.

After I cut the 24 inch boards, I cut the next 2×4 into 10 inch pieces, making enough so that each 24 inch board, would have 2 10 inch boards to attach to it.

The goal of the next step, is to attach the boards so they make the shape of a “U”. You can do this before or after you attach the 24 inch board to the wall. I ended up changing the way that I attach the boards. At first, I would press the boards against the ground and put a screw in the back of the 24 inch board (the side that would go against the wall), but that ended up not being quite as sturdy as I wanted it to be.

Once I had screwed those boards on, I went ahead and found the studs in my wall. I first tried the “knocking” method, but it seemed like the studs were too far apart. After a phone call to my dad, he suggested me going outside and finding where the screws were on the side of the house (we have a wood house) and that would be where the studs were. Sure enough, there was a screw 28 inches from the window. I went back inside and measured 28 inches from the window and then did the “knocking” method again, and there was my stud. I did find a really clever way to find a stud on YouTube by using a magnet. I didn’t actually try it, but it definitely looks like it could work. Warning, that guy is super quirky, but you should totally go check out his video.

Picture3

I lined everything up by lining up one piece and marking where the studs were on that one piece. I then went back to the other 3 pieces and made the same marks. I also took a small drill bit and drilled 4 holes on each side, where the screws were going to go to mount it to the wall.

Picture8

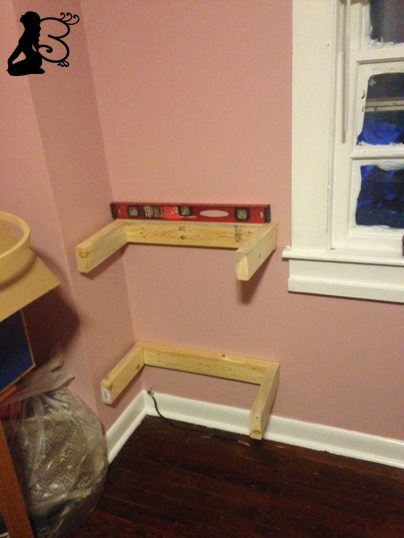
I then screwed the mounts onto the wall. I used a leveler to make sure they were lined up straight and then screwed them in. I totally used my foot to hold up the bottom one and then I figured that it was best that I get a little bit of help holding it while I screwed it in.

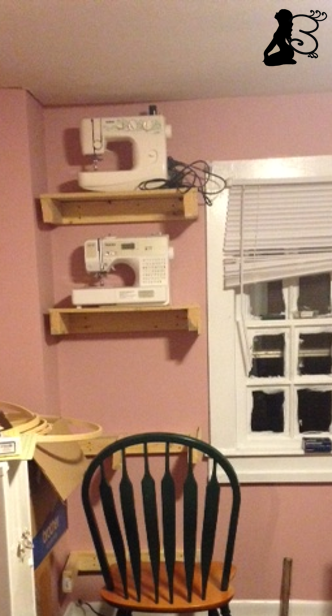
By this time, as you can tell by the “not scraped yet” windows, it was getting pretty dark and I decided to go ahead and close up shop for the day.

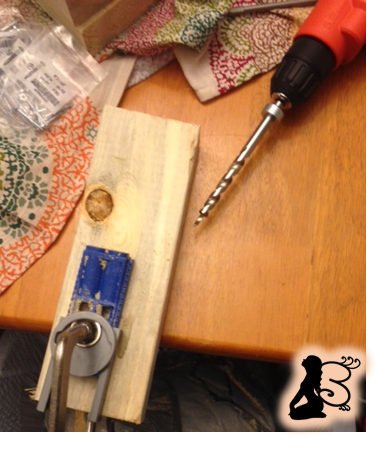
The next day, I decided to go to Lowes and pick up a new toy. That new toy was the Kreg Jig R3. I had heard of it from April Wilkerson who has an awesome YouTube channel and blog to go along with it. The Kreg Pocket Jig video was what introduced it to me and then after a little bit of searching, I discovered that I NEEDED to have it.

Picture1

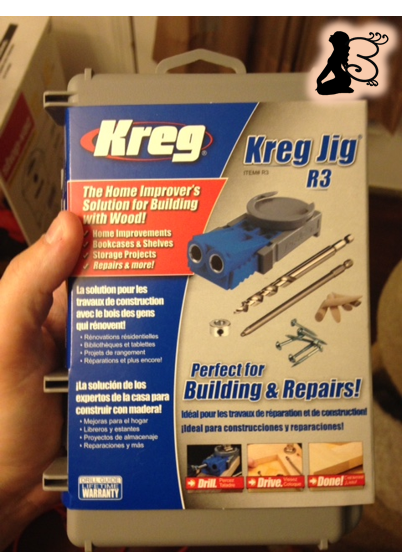
I picked this one up because I thought that it was very versatile and thought it would be perfect for what I had in mind. Let me tell you, it is AWESOME and so easy to use!!!

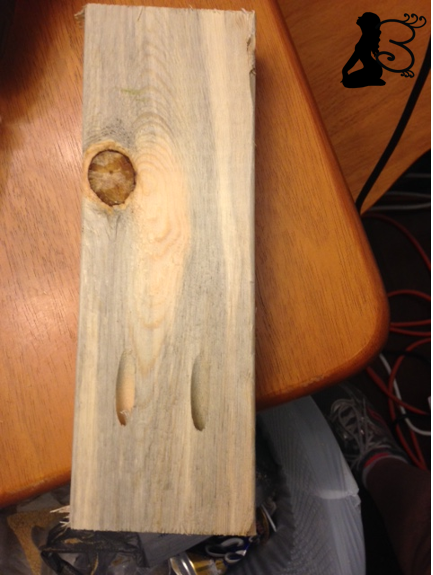
I got a 90 degree angle clamp, which does the job that I need it to do, to hold the jig to the board. Then I just screw the pocket holes in.

Picture7

Picture9

Like I said…. AWESOME!!!

It was also handy because I could go ahead and screw the 24 inch board to the wall and then come back later on and attach the 10 inch boards, however I didn’t do that at first.

Either way was super easy for get the boards attached to each other.

Picture10

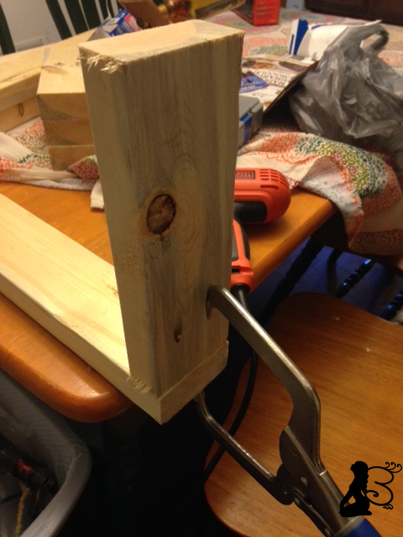
Look at how cool this clamp is!! It fits into one of the pocket holes and then clamps it to the second board. (Yes, I totally did this at the kitchen table.)

Picture12

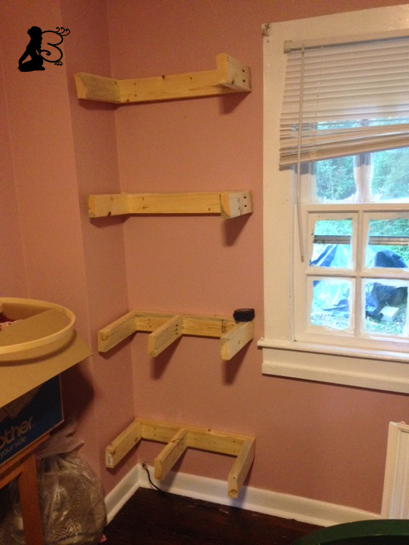
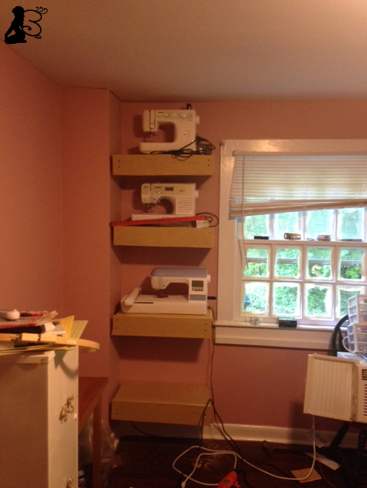
So I finally got all 4 pieces attached. You can see the part that juts out in the corner in this picture. I’m trying not to reveal too much of that room because it is still pretty messy from the move.

I ended up attaching a third board to the bottom two just to give it a little more support.

While at Lowes, I also picked up 2 pieces of 24×48 inch particle board. Plywood would have worked as well, but because this was going to be inside and the pieces I was using wasn’t going to be that big, I went ahead and used the particle board. Plus it was also cheaper.

Picture13

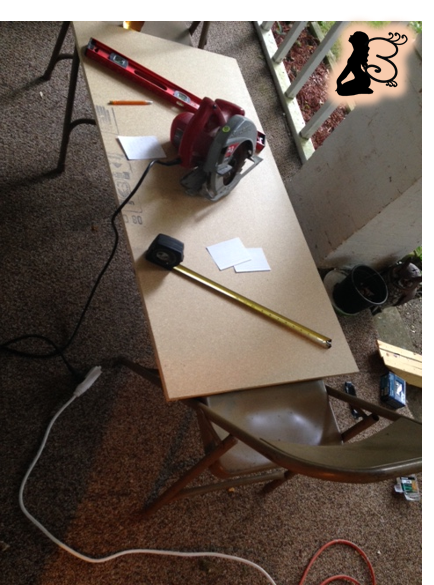
Don’t you like my chair-like saw horse? I totally cut these boards on my carpeted from porch. It’s ok. It’s nothing that a shop vac can’t take care of. ; )

I was careful to make sure I measure each one and then cut each one accordingly. I did have a hard time figuring out which piece I wanted to overlap which piece. I knew I wanted the front cover to overlap all sides, but I wasn’t sure about the top and the right side. I didn’t do a cover for the left side because I figured you wouldn’t be able to see it and the part that you could see, was just the cover from the other side. All of the top pieces ended up being roughly 25×12 inches.

Picture14

I did have a little bit of problem trying too attach the 2nd from the bottom on. For some reason I would not lay flush. I ended up taking that entire piece off and pulling off the right side. With only the middle and left support attached, I went ahead and screwed the top cover on. I then went and drilled pocket holes into the remaining board and the reattached it to the rest of the piece.

After the top cover was attached, I went back and attached the left side cover. By this point, it was almost finished and all I had to do was attach the from cover, and maybe a bottom cover to the shelves.

I went ahead and made the front cover all the same size. I figured that it would be a lot more noticeable for them to be different sizes than for it to hang off the bottom 1/4 of an inch.

Picture16

So here I am right now…… I’m not sure if I want to paint them white or Modge Podge some fabric over them….. or maybe paint some type of stencil on it.

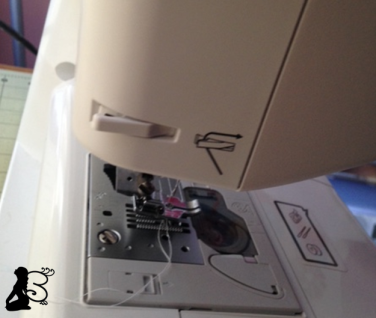
I do know that I love not having my sewing machines on the floor under my sewing table.

*Note: Please ignore the mess and the pain on the windows and the messed up blinds. This room is definitely a work in progress and it is definitely getting there. I am so in love with the progress so far.

*Note #2: I am in no way affiliated with Kregg. It was just the brand I had heard of so I decided to go along with them.

I’ll be back at a later date to post the 100% finished project, but it wouldn’t be me if I didn’t complete it 90% and then put it down for a bit.

Until next time,

Brittany


What to Know Before you Sew

Hi everyone, Brittany here again with another blog post about what you should keep in mind when you are wanting to learn to sew. Sewing is one of those hobbies that is constantly improving and the possibilities when starting to sew are never ending!!

1 – First thing that I want you to keep in mind is that it will not come overnight. Sure, you may be able to learn how to thread a sewing machine overnight, but after one sleep, you more than likely will not be ready for Project Runway. It takes a lot of time, patience, tears, frustrations, ripping out seams, and even threatening your sewing machine that you will throw it out a window. You will “sew” some gosh awful stuff and then you will get better. I got my first sewing machine for Christmas in 2012, so I have only been sewing for about 3.5 years. I’d like to think I’ve got the basics down and can follow a pattern, but I am no where near some of the folks I follow on YouTube.

2 – The second thing to keep in mind is seam allowance. I’m sure veteran sewers are reading this (if veteran sewers even come to my blog haha) and are thinking, “that is a weird thing to have for her #2”, but in my opinion, it total transformed my items I was sewing. When I sew quilt blocks, I am not satisfied with it unless the back seams are as pretty and even as they appear to be on the front. Typically for quilts, the seam allowance is 1/4 inch and for sewing clothes, it is 5/8 inch.

So what is seam allowance? Simply put, the seam allowance is the extra sliver of fabric that is left on the other side of the area that you stitched. If you are piecing a quilt block together, that sliver should be 1/4 inch and if you are sewing clothes, that sliver should be 5/8 inch (unless a pattern tells you differently). For instance, if you are trying to sew equal strips of fabric together, you want to make sure that you seam allowance is consistent. You don’t want one end of your strip to be 1 inch, while the other end is 3/4 inch, because trust me, you will be able to tell and it will look wonky.

You will be amazed at how much neater your projects will be once you understand the concept of seam allowance. Even if you choose to not use the 1/4 inch or 5/8 inch, at least keep them consistent.

3 – Thirdly is the quality of fabric. I’m not saying to go out and buy the highest quality of fabric that is out there – fabric from Walmart will totally work and DOES WORK NICELY. I just want y’all to learn from my mistake. The Christmas of 2014, I tried to surprise my mother-in-law with a Christmas inspired table runner because she had been talking about how she wanted one. I had seen some pretty green and red table runners at their local Dollar Tree and I wanted to go out, cut it up, and then sew it back together is a braided pattern. Boy was that one of those times where tears and threats came into play. That fabric shredded like crazy and the stitches kept coming apart!!! I was so frustrated and I couldn’t understand why it was not working out the way I wanted it to. My mother-in-law finally explained to me that Dollar Tree fabric probably does not the best quality fabric and that was why it was giving me such a hard time. It was that day that I learned about fabric quality and I will never forget about it.

3.5 – Going along with the quality of fabric is the quality of thread. It can be very annoying to be in the middle of something and then the thread break in your sewing machine. I will say that sometimes the problem isn’t the thread and it is the tension, but that’s a whole nother can of worms. You can typically look at thread and determine if it is a good quality or not. If you’re looking at it and it appears to be very “fuzzy”, chances are it is poor quality thread. Another test you can do is to wrap it around your fingers like you are flossing your teeth and then try to break it in half. If you pull hard enough, most threads will probably break in half. I’m talking about not putting a lot of force into it when you pull it and it coming apart. I have only come across some poor quality thread when it was a “buy 15 spools of thread for $5” (or something ridiculous like that) at Hancock Fabrics (RIP). I have also found that those cones of thread tend to not do very well when it comes to finicky projects, however just sewing 2 pieces of basic cotton together doesn’t seem to cause an issue.

Although this thread did not do well in my sewing machine, it did really well when I was hand binding a table runner or else practicing some hand quilting. Typically I just go to Walmart (I like to use Walmart as an example when I can because I know just about everyone has one in their town), and get the Coats thread in the bin at the end of the shelf for $1.

4 – The next thing to keep in mind is to not let a pattern intimidate you. I personally like to sew bags and quilts and then hoard the clothing patterns for me to use “at a later time”. The first thing to remember about a pattern is the envelope itself. The envelope has a lot of valuable information that you will need in preparation for sewing your item. It will have everything from types of fabric recommended, how much fabric is needed and notions required for each piece.

The inside will have 2 different types of paper, a lightweight piece that is your actual patter piece and then a heavier piece which are the instructions. At a later time, I will go into more detail about reading pattern.

5 – The final thing to keep in mind is to not be afraid to ask for help. I was at a local craft show and I was looking at all of the quilts that this lady had been making. I mentioned to her that I struggled with binding my quilts and they typically look really bad. After talking with her, it clicked about how important the consistency of the seam is (see #2). If my binding is consistently hanging off the edge by 1/4 inch all the way around, then when it is flipped over, it will be consistent on the front.

Also, part of #5 is to utilize social media. There are a lot of great tools online to help you figure out what you want to do. Check out my latest blog post, Top 10 Sewing/Craft YouTubers, to check out some awesome social YouTube folks that can show you anything and everything you ever thought you would need to know about sewing. Chances are, if you have a question about it, someone else has already had the same question and has put it on the internet.

Well that’s about all I have for this post. I’ve still got lots of stuff in the works, including a Dresden Plate Review/Tutorial, Floating Shelves Tutorial, as well as updates on current projects I am working on. Let me know of anything that would’ve really helped you when you started out sewing.

Until next time,

Brittany

*Note: The cute pink polka dot sewing machine is not mine and the original can be found here.


vintage-sewing-machine-clipart-1378851925oz8

Top 10 Sewing/Craft YouTubers

Since graduate school is done for the next little bit, I now have some time to sew and then blog about sewing!! So sorry I’ve been slack, this semester was a rough one that I am so glad is DONE!!

For those of you that are familiar with my history of how I got started sewing, know that I learned a lot of what I know from YouTube. It is because of them, I know what I know today. (Wow, that’s a lot of “knows”.) Anyways, I just wanted to give a shout-out to them to thank them for introducing a super awesome hobby to me and to recommend them to any of you new and veteran sewers out there. I do also need to give a shout-out to my awesome mother-in-law for her assistance in helping me sew my first article of clothing.

Obviously I watch more than 10 YouTube channels, so I will add a couple of honorary mentions at the bottom.

These YouTubers are in order and it may not be by the ones that I watch the most, but by how much I just enjoy their videos.

10 – Sewing Parts Online

I discovered Sewing Parts Online when I was looking into how to use different sewing feet. They have lots of tutorials on how to use more sewing feet that you will ever know that existed. The way they explain everything is just simple to understand. They have definitely added a lot more videos since I was last at their channel.

9- Amanda Rolfe

Amanda Rolfe’s YouTube channel is The Amanda Rolfe and her blog is 3 and 3 quarters. Amanda is a quilter from Australia (you’ll find that a lot of my favorites live overseas and I just love hearing them talk). There is just something about her that makes me have a friend crush on her. She sews a lot of modern quilts which typically isn’t my thing, but her fabric choice is always on point. She is very quirky and is just herself whcih is why I enjoy watchering her.

8 – Man Sewing/Rob Appell

What can I saw about Rob Appell? There is no one else like him out there. He is a just a rad quilting dude and that is the only way to describe him. He can be found on YouTube here and multiple blogs here and here. I discovered him when he and Jenny Doan from  Missouri Star Quilt Company (MSQC – below) did a video together, The Three Dudes Quilt and I totally fell in love with the way he does his videos. The first thing you notice when you watch his videos is his awesome latin music intro and then he is just so hyped about sewing it’s contagious. “Cool” is not a word that people typically think of when they think if sewing quilts, but he totally sells it!!

7 – Whitney Sews

I am totally in love Whiteny Edwards’s YouTube channel. She is nerdy and likes to flaunt it. Whitney has vidoes from her Cosplay costumes to her fabric swaps. She also talks about her love for thrit stores and getting as many sewing patterns as she can. Whitney may not be for everyone, but I totally love her videos!!

6 – Professor Pincushion

Professor Pincushion is one of the YouTube channels that has a little bit of everything sewing related. If you want to learn how to do it, Professor Pincushion will show you how. She also has a blog that coincides with her YouTube channel. She has everything from button holes, to attaching pockets, to understanding sewing patterns.It just has everything and if you’ve thought about maybe trying something new, you should definitely check her channel out.

5 – Melanie Ham/I Heart Stitching

Melanie Ham does sewing and craft tutorials and can be found here. Melanie is one of those people that just brings you in and explains what she does so well. She does smaller tutorials that can be knocked out in a couple hours, but the way she makes her items makes them very high quality. Y’all should definitely go and check her channel out.

4 – Debbie Shore

Debbie Shore is another one of my fun overseas YouTubers. Her videos, that can be found here, are so easy to follow and she does a really great job at dumbing things down. She is probably one of the first people that I watched that helped me learn how to make a basic tote bag, one of which can be found here. She is really fun to watch and, like everyone else I have listed, I definitley recommend her.

3 – Deby Cole/So Sew Easy

Deby Cole is the voice behind So Sew Easy and she is very similar to Debbie Shore (#4). She does a lot of simple tutorials for projects that can be completed in an afternoon, which I really appreciate. She is actually the one that got me into the Swoon Patterns. She did a tutorial on the Swoon Della Wallet Clutch  and I fell in love with it, which is why I ended up purchasing the Pearl Wallet Clutch (review from my blog can be found here). More recently, I ordered the Della and  I can’t wait to put it together. It definitely looks a lot simpler than the Pearl, so hopefully I won’t have any issues….. Anyway back to Deby…. Another thing that I like about her is that she isn’t afraid to make mistakes and then point them out for her audience so they won’t make the same one that she did. Making mistakes is an important part of the learning process and she has made sure that other people have learned from her mistakes. ALSO, one more thing I love about Deby is that she has only been sewing about as long as I have and you can read a little more about her on her blog found here. One of my favorite people to watch on YouTube so go watch her……. NOW!!

2 – Crafty Gemini/Crafty Gemini Creates

For those of you that do anything sewing related, you have heard of Vanessa from The Crafty Gemini and Crafty Gemini Creates. (*Note, I just found her Spanish version of her YouTube channel La Crafty Gemini, how cool is that!!) Anyways, she has lots of great quilting tutorials and was the one who taught me how to bind a quilt by hand, which can be found here (I think there was also one more YouTuber who had some input, but I’m not sure who it was.) She was also the very first podcast I ever listened to (it wasn’t hers, but it was someone else’s and she was a guest) and I was totally intrigued. That was when I knew I had an obsession…. when I listened to a quilting podcast and I was actually able to pay attention without rewinding it every 3 minutes. She also told me about Tuesday Mornings, which I always stop at whenever I am in a town that has one in hopes of finding that awesome sewing machine needles deal that she keeps managing to find. I could go on and on and on about her, but I think you should go find out for yourself. P.S. she has 2 blogs found here and here.

Ok, finally moving on to numero uno.

Drum roll please……..

DADADADADADADADADADADADADA (<<< this is my typing version of a drum roll)

1 – Missouri Star Quilt Company (MSQC)

Well I know that my husband certainly knew that this one was coming. If you’ve heard of Crafty Gemini, then I KNOW you’ve heard of Jenny Doan from Missouri Star Quilt Company. All the guys out there know exactly when their significant others are watching and MSQC video, and if they are like Josh, they make the “quack” noise at the end of their little jingle (which if you actually watch the video, you see that the “quack” is made by a chick and not a duck, but who cares, it’s still awesome!!) I have such a huge friend crush on Jenny Doan and when I go and visit my sister at Vet School at Kansas State (yes Kaitlyn, I do plan on visiting you), I totally want to make the drive to Hamilton, Missouri to visit their shops. They have multiple shops, which actually is a majority of the strip in their tiny town, and each shop has its own theme. They have holiday, batiks, solids, FLORALS (I’m a little excited about this one), licensed, solids, notions shops. (*Note: I’m not sure if this is 100% accurate, however I do believe it is mostly accurate and if not, then they should totally take my recommendations for these shop themes). Crafty Gemini actually does a tour of her shops on her video which can be found here. (When I went to find the video to attach it through a hyperlink, I totally almost forgot to tell y’all about the retreat center that she has!!!) They also have a Man Land for those fellas that get dragged to Hamilton by their lovely spouses. Oh my goodness, I have gone on and on about her shop, but I haven’t even talked about her videos….. THEY ARE FANTASTIC!! Jenny does a different quilt/block each week and it really simplifies it. She also uses a lot of templates and shows the different ways to use them. I actually just found a second channel that they have!!! AHH!!! It is called Talk Quilting. I can’t say anything about it because I didn’t know it existed until, just now, but you best believe I will be binge watching them once this post has been published. Much like Crafty Gemini, I can go on and on and on about MSQC, but I think you should just go check her out yourself.

Well now that I have probably his my hyperlink limit, I’ll leave you with a few honorary mentions. I have watched some of these and I know some of them are popular among other folks. They are Angela Clayton, April WilkersonLeah DayFat Quarter ShopFons and PorterMadeByMarzipan, and Quilt in a Day.

Well, it’s about bed time for me so I’m gonna let you go so you will have a chance to check out all of these people. Let me know if there is anyone else that y’all follow on any type of social media as I am sure that I have left several folks out.

Until next time,

~Brittany


Swoon Pearl Wallet Clutch Review

I am so so sorry for being M.I.A. these last couple of weeks. Between graduate school and work, it has got me running around like crazy. The one opportunity that I did have to get a little bit of sewing/blogging done, I got sick and all I wanted to do was cuddle up on the couch and watch HGTV.  Anyways, on to the review.

This is my first pattern review and I’ve got several more that I’d like to do. Several weeks ago I made the Swoon Pearl Wallet Clutch and I absolutely LOVE IT!! I originally wanted to do the Swoon Della Wallet Clutch when I found a tutorial on So Sew Easy’s YouTube channel. (If yall haven’t checked Deby out on YouTube, you should definitely check her out – plus her accent is pretty cool.) This wallet is pretty cool because it can come apart and serve as just a wristlet. I didn’t have any of the hardware to attach the strap, but just so you know…. it does that.

I am by no means an expert sewer and this pattern is just perfect for that. If you can read basic instructions, then you can make this wallet clutch.

The longest part of this project is definitely the prepping stage. That stage probably took longer than that actual construction of the wallet.

prep

The pattern called for a fusible stabilizer (Pellon Peltex 71F). I had never actually worked with stabilizer like this before and to be honest, I was a little bit nervous about it. I tried finding reviews about different stabilizers/interfacings but I couldn’t never find that perfect one that dumbed it down just enough for me. I wasn’t sure if I would be able to sew through it or if it would gunk up my needle. Well it was actually very pleasant to work with and I would gladly work with it again.

Although this was a very easy to sew pattern, there were a couple of times when I had to reread a couple of things to make sure I was on the right track. One thing that I found was a little tricky was once I had both pieces attached to the Card Slot Panel, I wasn’t exactly sure how to proceed. I will say that at this point, I was super excited that it was actually looking like a wallet with card holders, but I was terrified that I was going to mess it up. The instructions read “Now wrap the Backing (past the stabilizer) against the wrong side of the pleated Card Slot Panel, and match the long raw edge of the Backing with the long raw edge of the Card Slot Trim and pin together”. I read that sentence at least 10 times before I saw the sentence afterwards that says “They will be wrong sides together”. Basically what it means is… Hey Dummy, fold it in half like it shows in the picture and stitch it. I was so confused because I was thinking that these stitches had to be hidden and I was ready to sew something and flip it right-side-out…. WRONG. When I realized it was as simple as folding it in half, I noticed that it gets folded on the other side of the stabilizer that is attached to the Card Slot Panel.

fold and stitch.JPG

So this is what it looks like before it is folded. You will notice that when you fold it in half, it will naturally fold on top of the stabilizer piece to include it to the front with the polka dotted card slot. Does any of that make ANY SENSE?!?! 🙂

insideout2

This is what it looks like when it is folded in half. The piece on the left side of both of them (where the arrows are) is the side with the stabilizer and the raw edges meet on the right side. If you look closely to the shorter piece, you can see a little bit of the stabilizer hanging out at the bottom. And yes, these are 2 different sizes and not your eyes playing with you. You have to have one smaller than the other so it will fit inside of the other piece.

Ok so moving on from that…. now that I have confused the mess out of everyone – I promise the instructions are very simple once you read them. One more piece that I found confusing until I did it was when she said “If the Card Slot Panel ends up on the exterior side, simply flip it back over to the lining side of the Bifold”. I read this and immediately freaked out because I thought I was going to have to sew something, flip it right-side-out, realize I messed something up, flip it inside-out again and resew. This was not the case.

insideout

As you will see in this picture, the card slot is on the inside of the wallet. This is obviously not how it is supposed to be, however, I had also already flipped it right-side-out one time. This is what she meant by the instructions in the previous paragraph. I’ll tell you what, I was so nervous about flipping it. I had already flipped one part and I was worried it would crinkle the stabilizer that I was using and look super bad. I was new to this type of stabilizer and did not know how it would handle it. Let me tell you, IT WAS AWESOME!! It did not get wrinkled at all, and with a little press, it was perfect.

I ordered the magnetic snaps from Amazon. I think I got about 20 for $6 and if you have ever purchased these snaps from Michaels, you know this is a great deal!! The ones I got were actually smaller than what I typically use and I was a little nervous about them and almost sent them back. Well they were perfect!!! I actually think that normal sized ones would have been too big. The seller that I bought them from can be found here. The zipper that I used was purchased a 9 inch YKK zipper from Zipit in Slate Grey. I’ve gotten several zippers from her and I think that the grey color is so pretty and goes with just about anything.

finished2

finished1

Constructing the wallet went by super quick – even with me running and showing Josh what I had done and trying to get him to guess which part of the wallet I was sewing. I definitely plan on making several more, if I can ever find the time to do it.

I believe that is it for now, at least that I can remember. I typed a majority of this post up and then I got sick again, plus had a 15 page paper to write for graduate school so it kinda go put on the back burner. I hope you enjoy reading it and please don’t let my review intimidate you from trying it out. It really is very simple to make as long as you read the instructions carefully.

Until next time,

Brittany


Top 10 Sewing Notions

Howdy Folks!!

When thinking about what I was going to write for my next blog post, I completely drew a blank. As I was sitting there, I got to thinking that I really wanted to play with some of my sewing “toys” when I got home and thought “THAT WOULD MAKE AN AWESOME BLOG POST!!” So here it is, my top 10 sewing notions that I use, pretty much on a daily basis.

**PLUS** There is an honorable mention at the bottom.

This list is in no particular order and I’m sure that I will think of more things as I lay in bed tonight. I am not affiliated with any of these items listed, I just really enjoy using them.

  1. Quarter Inch Foot

This is the 1/4 inch foot that I have and I love it!! I actually got another one for Christmas a couple of years ago but it was before I realized my sewing machine actually came with one. Some 1/4 inch feet have a guide along the side to make sure that the fabric doesn’t go beyond the 1/4 inch seam allowance, which I believe my other foot has attached to it. I typically use this when I am piecing a quilt/block together as most of them require the 1/4 seam allowance. One thing I learned as I was sewing more and more was how important it was to have accurate seams. It’s amazing how much an inaccurate seam allowance can throw off a quilt block. One thing you have to pay attention to, which I actually talked about in my previous blog post found here, is making sure that your sewing machine needle doesn’t have a default setting that is not centered. This will cause your needle to go down onto the metal plate, which as you can imagine, is not very good for your needles.

2) Dresden Template

This little 8 inch piece of acrylic is AWESOME!! One of Josh’s family members got it for me for Christmas a couple years ago and I am so in love. As you can see, you can use different sizes of fabric to create a different look. I believe some Dresden’s may go up to 10 inches, which can be used on a layer cake.

 :

I made this super cute Dresden clock last year using 5 inch charm packs. As you can see, even with the 5 inch blocks, it still makes a pretty big Dresden plate. I plan to eventually make a flower out of it, but I haven’t quite gotten that far down my project list.

3) Zipper Foot

Much like by 1/4 foot, my zipper foot is a very popular and sees my sewing machine a lot. I know a lot of people don’t like sewing zippers, but it is actually one of my favorite things to do!! Once the technique clicks (sandwiching the fabric and zipper the correct way) you will love it too. It’s actually like riding a bike. I love that you are able to move the foot to one side or the other, depending on which side your zipper is on. I have also discovered that the zipper foot works really good when topstitching. I typically like using it when I an topstitching next to a zipper. Just nest the edge of the fabric under the lip (where the zipper teeth would normally go) and you will have a straight topstitch for days!! (I’ll post a picture of this technique when I get a chance to do it again.)

4) Rotary Cutter

This is the rotary cutter that I use. It’s a Walmart special. If you enjoy sewing, not even just quilting, this is something that you MUST OWN! Don’t make the mistake that I made, though. Before I realized that this is supposed to be used with a cutting mat, I used it on a wooden cutting board. I could not figure out why it didn’t work so I took it back to Walmart assuming that I had just gotten a cheap one (this was a different one than this particular one). Then I got one for my birthday and those folks also got me a cutting mat to go along with it and boy did it make a big difference. I also recently bought a smaller one for cutting smaller pieces, which is awesome!! One more dummy thing that I did recently was accidentally put two rotary blades on at the same time. When you get a new set of rotary blades, they come covered in oil. Well I was using it and I couldn’t figure out why my fabric kept fraying, that is until I could see the two of them stuck together from the oil. Needless to say, once I realized this issue, it was quickly resolved.

5, 6, 7) 12 x 12, 4 x 10 and 6 x 24 Acrylic Rulers


Numbers 5, 6, and 7 have got be my 3 favorite acrylic rulers (sorry I couldn’t find a 4×10). First up is the 12 x 12 inch acrylic ruler. This is a really great ruler for squaring up my quilt blocks. For blocks with a 45 degree seam, just line it up with the appropriate degree on the ruler and square it up.

Next up is my 4 x 10 inch acrylic ruler. I really love this ruler for when you are working with smaller pieces of fabric. It’s not too bulky and just really easy to handle and cut fabric with.

The final ruler is the newest to my collection and it is my 6 x 24 inch ruler. This is a really great ruler for when you are cutting bigger pieces of fabric from the piece that comes off of the bolt (like when you get a yard from Joann’s or Walmart). I was so excited when I got this ruler, b/c it was just nice to be able to cut things that were bigger than 12 inches…. it also goes really well with my cutting mat that is coming up next 🙂

8, 9) 12 x 18 and 24 x 36 inch cutting mat

Hang with me folks, I’m almost done. Here is one of the most used items that I have and that is my cutting mats (notice that this is not made of acrylic, Josh). The 12 x 18 inch  mat is obviously used for cutting smaller projects, which is very handy. I like to use my 24 x 36 inch mat for my big projects (typically used with my 6 x 24 inch acrylic ruler). You will actually be surprised how many projects actually require a bigger surface than 12 inches and that is where this mat really comes in handy. It was a birthday present this past year and I was ecstatic when I saw it wrapped in wrapping paper (it’s kinda hard to disguise this).

10) Wonder Clips

For anyone that is currently sewing, they have heard of the wonder clips. I probably use these now more than I use pins. They are so convenient and easy to use. I mostly use them for when I am sewing a binding or anything other than a straight seam. Another great use for them is when I am sewing with vinyl and I don’t want to puncture my fabric. For all the ladies out there…. these things are like bobby pins to me, you know you have tons, however you can never find them.


Both of these items are lined with vinyl and I was unable to use pins when I was sewing them together. This wonder clips were wonderful and kept everything together for me. (The cBa toiletry bag is the Hang About Toiletry Bag created by Two Pretty Poppets and the pattern can be purchased here. Lisa from Two Pretty Poppets even has a sew along that you can follow!! The Aztec looking toiletry bag was is the Rollie Pollie Organizer created by Cozy Nest Designs and can be found here.)

*Bonus*

Flower Pot Pincushion/Tape Measure

flower pot

When I first started sewing, my awesome mother-in-law got me this little gem. I did not realize that I would use it as much as it do. It is a flower pot pin cushion and has a little leaf on the side that acts as a tape measure. I have not been able to find this sucker anywhere else (even when I can remember who makes it). If any of you can get your hands on this awesome tool, I definitely recommend it!!

One more thing…….

Ok so after I wrote about my bonus item, I had to do an honorary bonus item. This is a magnetic pincushion and is also pretty amazing. This is fantastic when you are sewing in a hurry and lay your pins on the table or spill all your pins all over the floor (which I would NEVER do 😉 hehe). All you do is run it over where your pins are and it picks them up for you. VERY CONVENIENT!!


Ok folks, that’s about all I have for today. I hope this has been informative and you have learned a thing or two about all (well some) of the fancy sewing notions that are out there for you to try. Obviously there are several (LOTS) more that I have but just left off the list. Let me know what sewing notions are your “go to” items!!

Until next time.

Brittany 🙂


Top 10 sewing notions

Braves Sneak Peak

OK folks, here is your very first sneak peak of what I intend to sell in my Etsy store (if I can ever get it 100% up and running). Anyways, being located in the Southeastern USA, I know quite a lot of my friends, including family members are Atlanta Braves fans.

Braves1

I am so in love with these and I think the suede adds a super nice touch….

Braves3

Stay tuned for when I finally reveal what awesome thing I have put together for you!!!!!

Braves2

Until next time……

~Brittany

Brother SQ9185 Sewing Machine Part 2

Oh my goodness, I am so sorry it has been so long since I have posted the part 2 to my Brother SQ9185 blog post. I was away at training for a week and then my graduate classes started back up again. If you haven’t read part 1, go check it out. <— I totally went back in and added this little hyperlink when I figured out how to do it further down.

Let’s see if I can remember what I have said about this sewing machine and what I have not. Did i mention that I love it?!

First off, I will hit on the drop-in bobbin.

If you have never used  a sewing machine with a drop in bobbin, I totally recommend you giving it a try. It is glorious and must easier to use than a front loading bobbin!! You don’t have that weird bobbin cover that you have to worry about, or have to take that storage compartment off to reload a new bobbin. As you can see in the picture, it has a diagram that shows you how to load the bobbin (counter clockwise) and how to thread it around so it can be picked up by the needle.

Next up is the thread cutter. This is the middle of the line thread cutter. It’s not the fancy thread cutter that knots off the thread and then cuts it with the press of a button, but it gets the job done without having to hunt for a pair of scissors.

Thread cutter

This little feature is a lot more handy that one would think. It has almost become muscle memory to cut my thread using this feature. I even tried using it when I was on my other sewing machine – Brother LS2350, which that review can be found here. <—OH MY GOODNESS, I CAN’T BELIEVE I FIGURED THAT OUT!!! AHHH!!! Ok, back to the review…. Anyways, my old sewing machine doesn’t have this little feature, which is disappointing when I go to cut my thread and there is nothing there to cut it. I’m sure the automatic threader is wonderful, but for right now, mine works perfectly!!

Next up is the fancy capability of dropping the feed dogs. I really like this for free motion quilting. On the back of some sewing machines is a little switch that will lower the feed dogs so it won’t feed the fabric forward. If you don’t have this feature, you can set your stitch length to zero, and you should be able to accomplish the same thing. One complaint that I have heard about the feed dog drop is that the tension can become kinda funky. Tension is a word that I don’t like to talk about because I don’t understand it 100%. The cool thing about this sewing machine is that it doesn’t really have a tension knob that you have to worry about.

Feed dogs

Something else that is a pretty small feature, but comes in handy is the storage compartment. This is so nifty because you don’t have to take the whole thing off in order to gain access to everything that is inside it. My Brother LS2350 has a storage compartment that you have to take completely off in order to get items (such as a seam ripper when you mess up your stitches, or bobbins for when you run out right before you finish a project).

As you can see, you can keep the storage compartment intact as you look for your little thing-a-ma-jigs.

Another thing I like, but haven’t really utilized a whole lot is the extending table. In order to use this, just pop the storage compartment off and slide the extending table on. I typically use this when I’m piecing a quilt block together so I can have more space to see what I’m doing.

Well I think that just about covers everything that I can think of…. All-in-all, I really love the Brother SQ9185 and would recommend it to anyone who wants just a good all-around sewing machine.

Next up, I’ll probably talk about my iron that I have been using (I know what you’re thinking… IRON?? haha).

Also, if you’ll notice in the corners of my pictures, I have incorporated a little fairy logo that will now be associated with my blog and anything else associated with me. I will probably do a post about it at some point.

Until next time,

Brittany