
I am so so sorry for being M.I.A. these last couple of weeks. Between graduate school and work, it has got me running around like crazy. The one opportunity that I did have to get a little bit of sewing/blogging done, I got sick and all I wanted to do was cuddle up on the couch and watch HGTV. Anyways, on to the review.
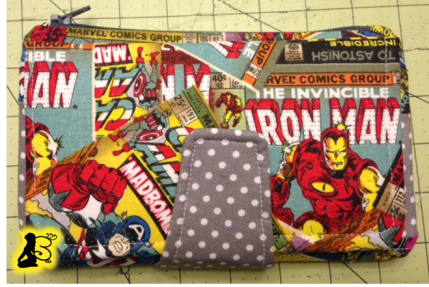
This is my first pattern review and I’ve got several more that I’d like to do. Several weeks ago I made the Swoon Pearl Wallet Clutch and I absolutely LOVE IT!! I originally wanted to do the Swoon Della Wallet Clutch when I found a tutorial on So Sew Easy’s YouTube channel. (If yall haven’t checked Deby out on YouTube, you should definitely check her out – plus her accent is pretty cool.) This wallet is pretty cool because it can come apart and serve as just a wristlet. I didn’t have any of the hardware to attach the strap, but just so you know…. it does that.
I am by no means an expert sewer and this pattern is just perfect for that. If you can read basic instructions, then you can make this wallet clutch.
The longest part of this project is definitely the prepping stage. That stage probably took longer than that actual construction of the wallet.
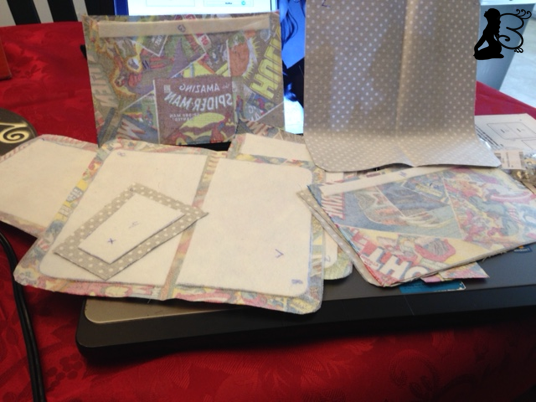
The pattern called for a fusible stabilizer (Pellon Peltex 71F). I had never actually worked with stabilizer like this before and to be honest, I was a little bit nervous about it. I tried finding reviews about different stabilizers/interfacings but I couldn’t never find that perfect one that dumbed it down just enough for me. I wasn’t sure if I would be able to sew through it or if it would gunk up my needle. Well it was actually very pleasant to work with and I would gladly work with it again.
Although this was a very easy to sew pattern, there were a couple of times when I had to reread a couple of things to make sure I was on the right track. One thing that I found was a little tricky was once I had both pieces attached to the Card Slot Panel, I wasn’t exactly sure how to proceed. I will say that at this point, I was super excited that it was actually looking like a wallet with card holders, but I was terrified that I was going to mess it up. The instructions read “Now wrap the Backing (past the stabilizer) against the wrong side of the pleated Card Slot Panel, and match the long raw edge of the Backing with the long raw edge of the Card Slot Trim and pin together”. I read that sentence at least 10 times before I saw the sentence afterwards that says “They will be wrong sides together”. Basically what it means is… Hey Dummy, fold it in half like it shows in the picture and stitch it. I was so confused because I was thinking that these stitches had to be hidden and I was ready to sew something and flip it right-side-out…. WRONG. When I realized it was as simple as folding it in half, I noticed that it gets folded on the other side of the stabilizer that is attached to the Card Slot Panel.
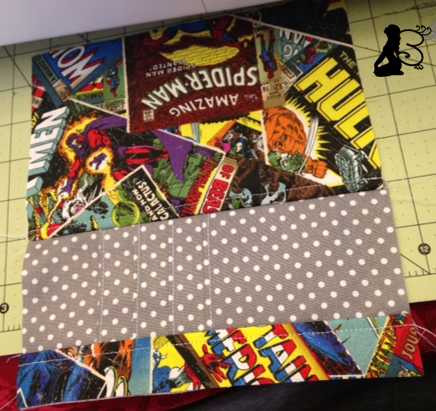
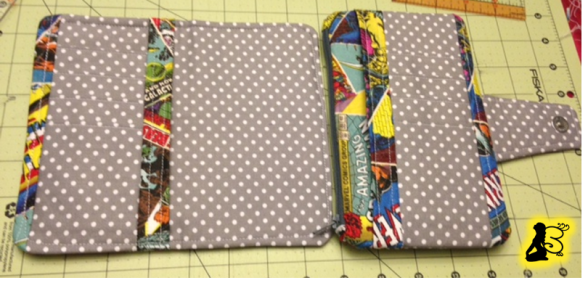
So this is what it looks like before it is folded. You will notice that when you fold it in half, it will naturally fold on top of the stabilizer piece to include it to the front with the polka dotted card slot. Does any of that make ANY SENSE?!?! 🙂
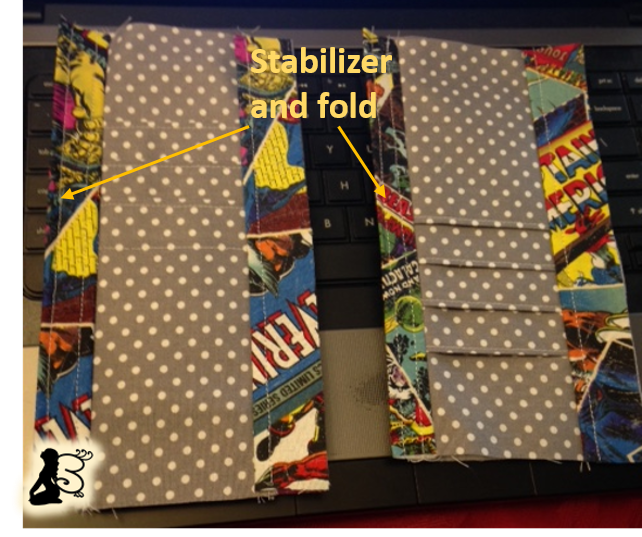
This is what it looks like when it is folded in half. The piece on the left side of both of them (where the arrows are) is the side with the stabilizer and the raw edges meet on the right side. If you look closely to the shorter piece, you can see a little bit of the stabilizer hanging out at the bottom. And yes, these are 2 different sizes and not your eyes playing with you. You have to have one smaller than the other so it will fit inside of the other piece.
Ok so moving on from that…. now that I have confused the mess out of everyone – I promise the instructions are very simple once you read them. One more piece that I found confusing until I did it was when she said “If the Card Slot Panel ends up on the exterior side, simply flip it back over to the lining side of the Bifold”. I read this and immediately freaked out because I thought I was going to have to sew something, flip it right-side-out, realize I messed something up, flip it inside-out again and resew. This was not the case.
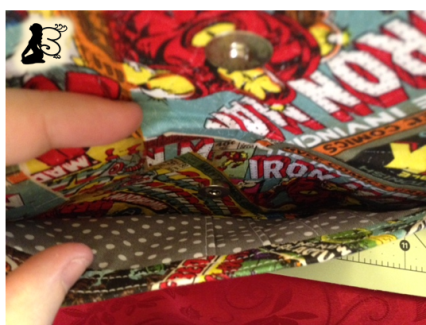
As you will see in this picture, the card slot is on the inside of the wallet. This is obviously not how it is supposed to be, however, I had also already flipped it right-side-out one time. This is what she meant by the instructions in the previous paragraph. I’ll tell you what, I was so nervous about flipping it. I had already flipped one part and I was worried it would crinkle the stabilizer that I was using and look super bad. I was new to this type of stabilizer and did not know how it would handle it. Let me tell you, IT WAS AWESOME!! It did not get wrinkled at all, and with a little press, it was perfect.
I ordered the magnetic snaps from Amazon. I think I got about 20 for $6 and if you have ever purchased these snaps from Michaels, you know this is a great deal!! The ones I got were actually smaller than what I typically use and I was a little nervous about them and almost sent them back. Well they were perfect!!! I actually think that normal sized ones would have been too big. The seller that I bought them from can be found here. The zipper that I used was purchased a 9 inch YKK zipper from Zipit in Slate Grey. I’ve gotten several zippers from her and I think that the grey color is so pretty and goes with just about anything.
Constructing the wallet went by super quick – even with me running and showing Josh what I had done and trying to get him to guess which part of the wallet I was sewing. I definitely plan on making several more, if I can ever find the time to do it.
I believe that is it for now, at least that I can remember. I typed a majority of this post up and then I got sick again, plus had a 15 page paper to write for graduate school so it kinda go put on the back burner. I hope you enjoy reading it and please don’t let my review intimidate you from trying it out. It really is very simple to make as long as you read the instructions carefully.
Until next time,
Brittany

I am beginning to make the pearl wallet for the first time today. I am confused about fusing the stabiliser to the pieces as I think I was instructed to cut them out to be the same size of the piece that I am attaching them to, but the picture makes it look like the stabiliser pieces is about 1/2 inch smaller all around. So do I trim the stabiliser piece , then attach it? Any help would be appreciated!
LikeLike
Thanks for this! I’m making my first Pearl today and am totally confused even after reading this tutorial and watching the YouTube video. That’s ok, though. I know I’ll figure it out and even if this one is wonky, the next one will be better. 😉
LikeLike